
Huge Guide to Drawing Cartoon Pumpkin Faces / Jack O'Lantern Faces

Huge Guide to Drawing Cartoon Pumpkin Faces / Jack O'Lantern Faces

Huge Guide to Drawing Cartoon Pumpkin Faces / Jack O'Lantern Faces

Huge Guide to Drawing Cartoon Pumpkin Faces / Jack O'Lantern Faces

Huge Guide to Drawing Cartoon Pumpkin Faces / Jack O'Lantern Faces

How to draw pumpkin step by step The Smart Wander
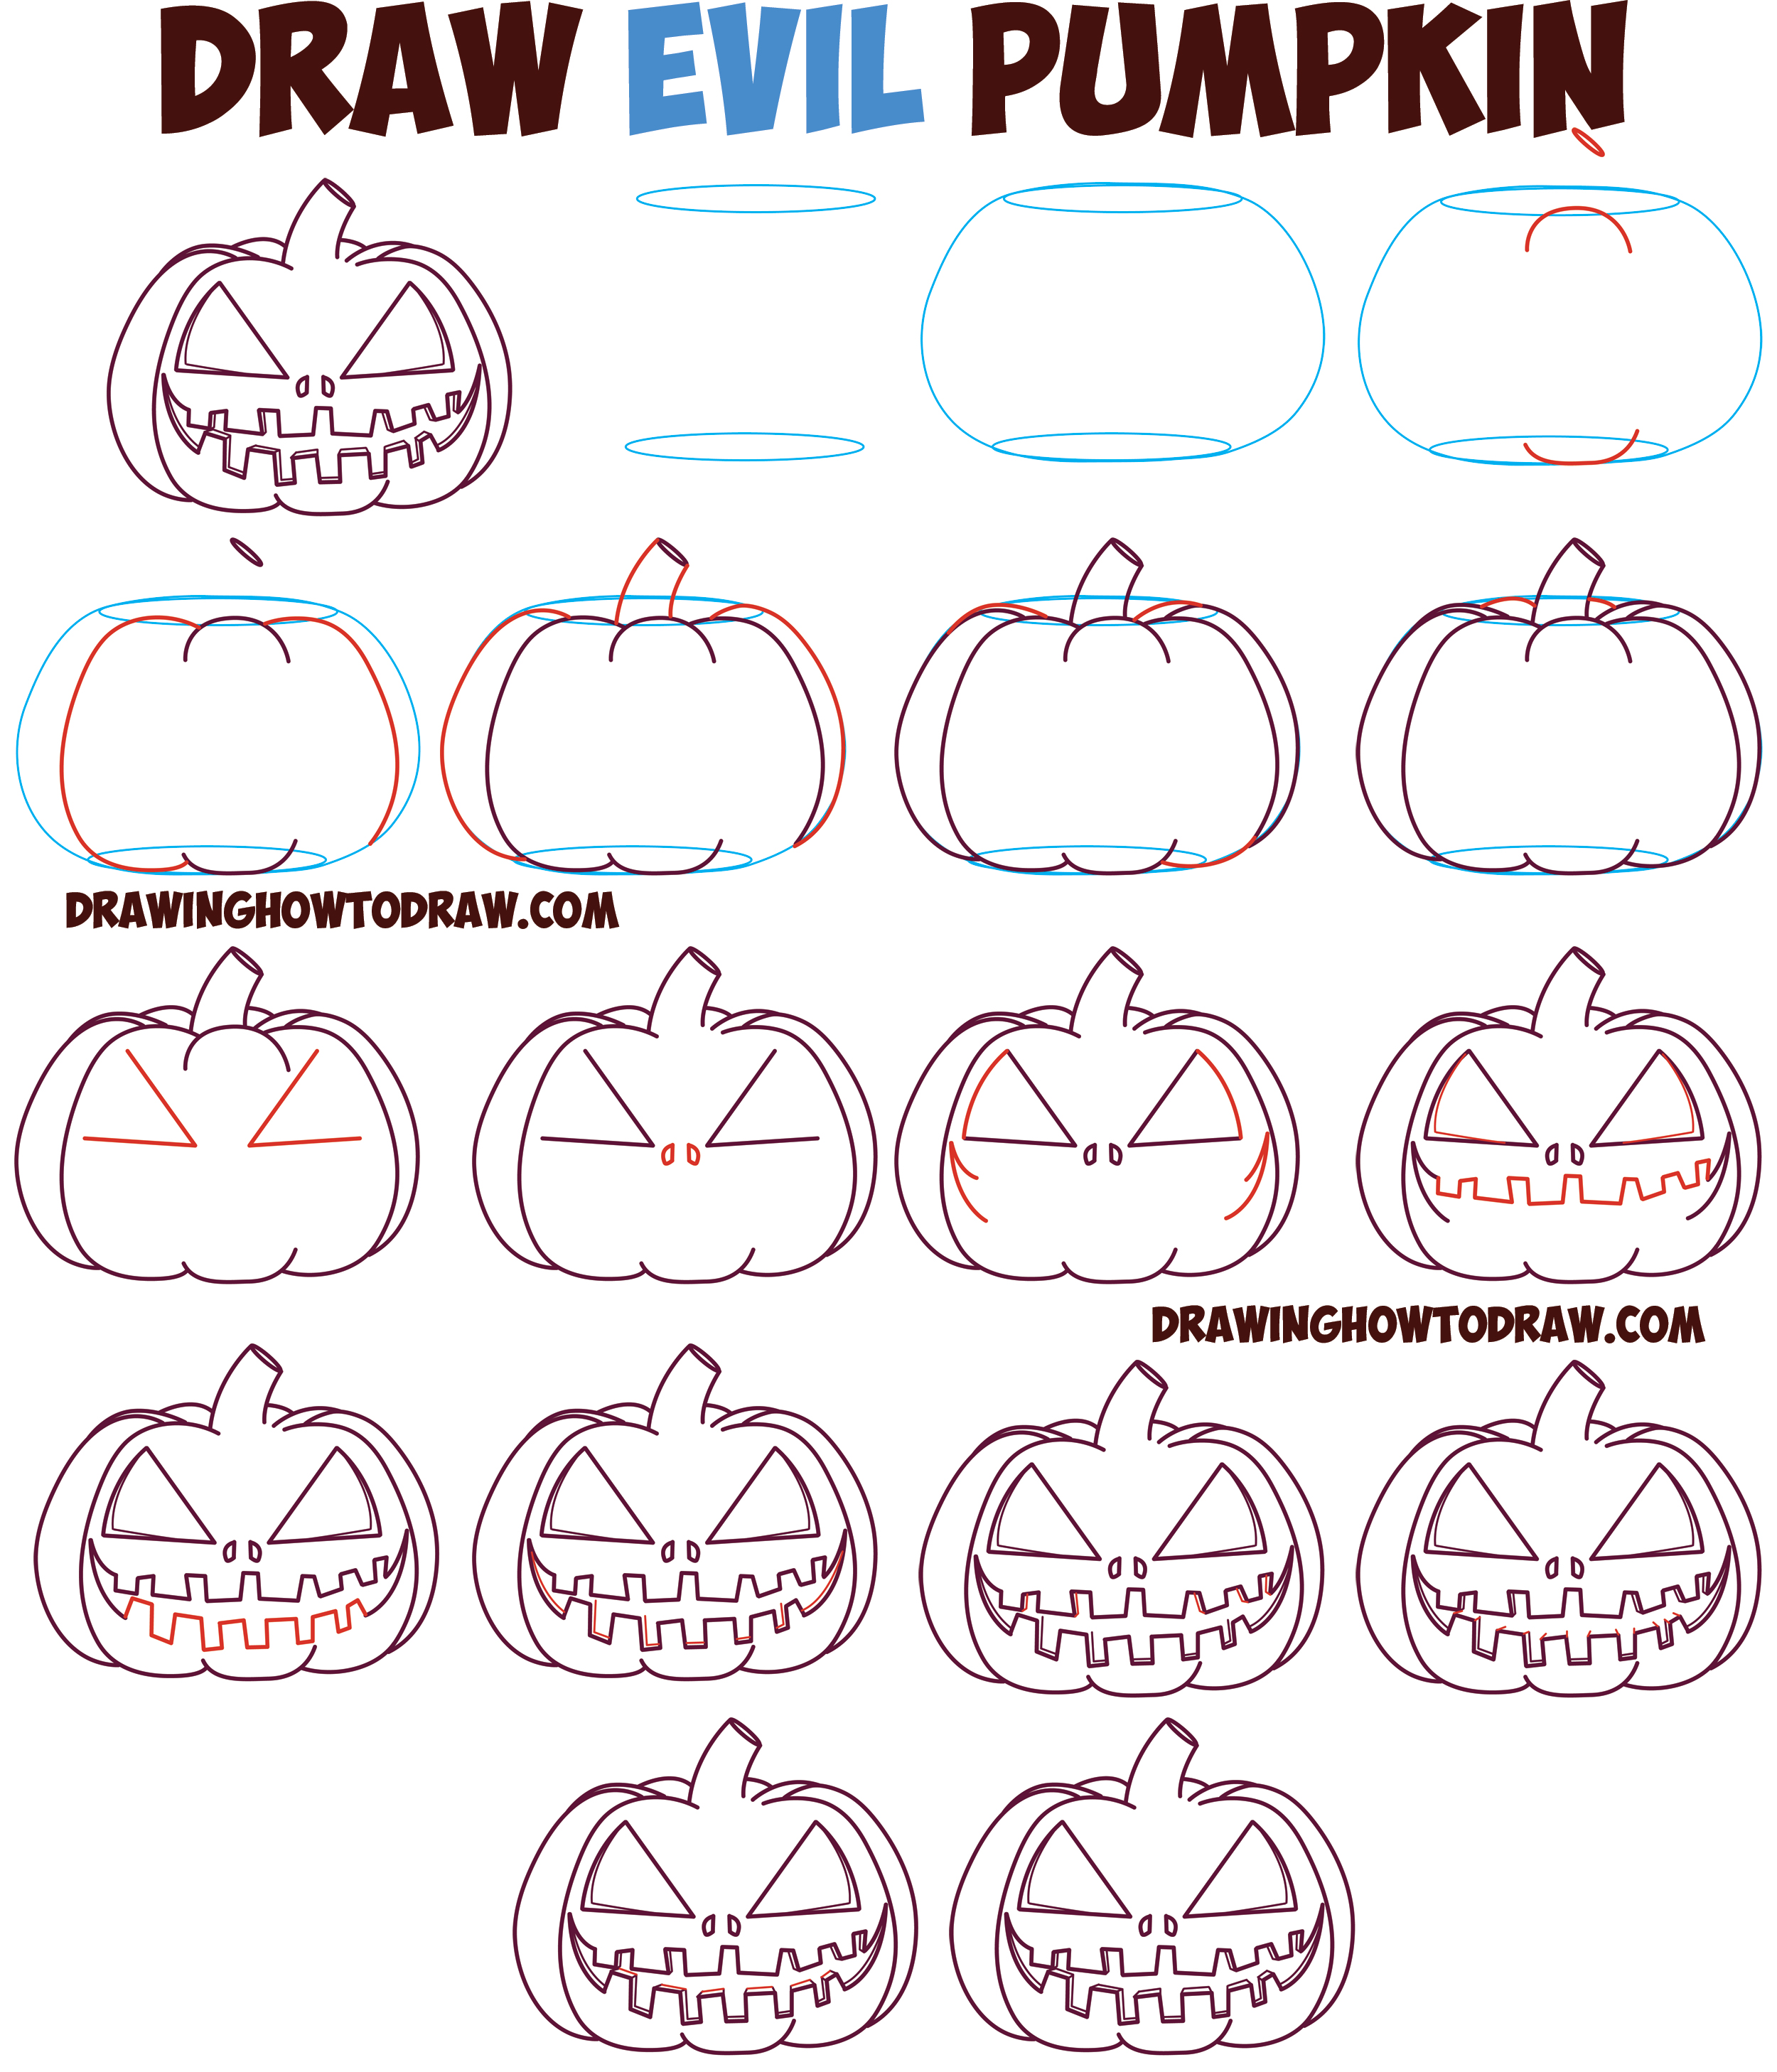
Web step 1 to start the process of learning how to draw a pumpkin, the first thing that you should start with is drawing an oval shape using a pencil.
How to draw a face on a pumpkin step by step. Web that's why we've put together this step by step drawing tutorial that will help you draw a pumpkin in just a few steps. Web drawing on a pumpkin is pretty easy, as long as you have the right markers or paint and a bit of patience. Web step 1 to begin, draw a large circle as the general shape of our pumpkin.
Web our pumpkin drawing tutorial will show you how to build up the basic form using curves and familiar shapes, then add a spooky face to bring your pumpkin to life. By drawing curved lines, you can easily draw the stem. For a realistic pumpkin, sketch some contour lines at the bottom of the pumpkin and draw ribs of the pumpkin on the back.
Classic pumpkin face drawing pumpkin faces: On top of the pumpkin, instead of a stalk draw whimsical leaves and flowers! Only by drawing four curved lines, you will be able to draw the backs.
Web to draw a pumpkin with flowers, start with a large circle shape, add a face and mouth inside it. Web kids will enjoy this simple step by step lesson for learning how to draw a pumpkin face with a pencil and crayon on paper. Then, draw a matching curved line on the right side of the pumpkin to make it round.
How to draw a pumpkin face how to draw a cute pumpkin: This will form the base of your pumpkin. All you need to get started is a photo or model of your ideal gourd, a pencil, a pen, and some paper.
This easy halloween drawing lesson is perfect for. Make several different shapes of pumpkins and color them in rainbow colors. First, you’ll need to cut a hole in the top of the pumpkin to remove the stem and the insides.

Halloween pumpkin drawing easy 👻 How to Draw Halloween Pumpkin Easy

How To Draw A Halloween Pumpkin, Halloween Pumpkin, Step by Step

How to Draw a Halloween Pumpkin Pumpkin drawing, Halloween pumpkins

How To Draw A Pumpkin For Kids Step By Step

How to draw easy and cute Halloween pumpkin stepbystep Pumpkin

How to Draw a Halloween Pumpkin Face YouTube

How to draw halloween stuff step by step The Smart Wander

How to draw pumpkin step by step YouTube

How to draw Pumpkin for kids step by step drawing tutorial, draw

Pippi's blog Halloween drawings for kids

How to Draw an Easy Pumpkin · Art Projects for Kids Halloween art

How to Draw a Pumpkin Step By Step Guide

How to Draw a Pumpkin Face Halloween Spooky Drawings Easy pictures

