
How to Draw Sneakers / Shoes with Easy Step by Step Drawing Tutorial

Shoe Drawing How To Draw A Shoe Step By Step

HOW TO DRAW SHOES Sneakers Sketching & Coloring Tutorial YouTube

HOW TO DRAW SHOES EASY FOR KIDS DRAW SHOES STEP BY STEP. YouTube

How to Draw a Shoe Really Easy Drawing Tutorial

How to Draw Sneakers / Shoes with Easy Step by Step Drawing Tutorial
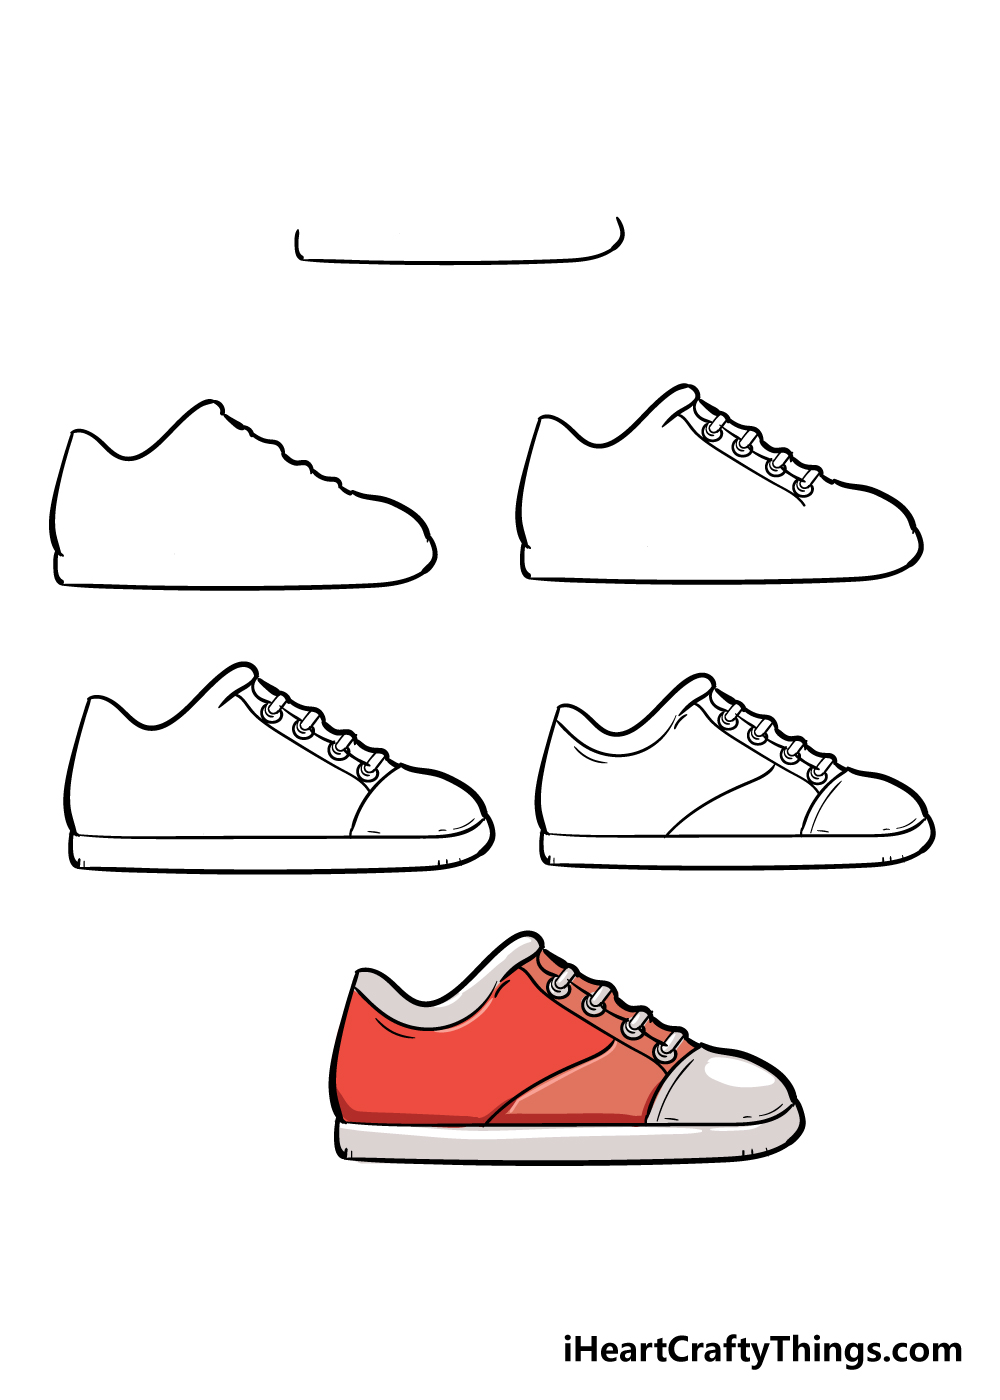
Add details and draw your.
How to draw the shoe. Web how to draw shoes step by step 👞 shoes drawing easy. Web first, you draw the sole of the shoe. Web the red shoes’ production designer hein heckroth won an academy award for art direction, along with the film’s art director arthur lawson, and created dozens of concept illustrations.
The goal here is to get the correct proportions as well as the general flow of it’s shape. The first step in drawing a shoe is to start with guides. Finally, please color to have a.
Web the first four episodes of the final series of netflix's the crown have split critics, but many have given it the thumbs down. On the sides, sketch out two short connecting lines. Add the top of the shoe.
Web depict the front of the shoe. Step 2 add a rectangle with rounded edges. First, draw the shoe toe and then its instep.
Step 2 extend the top line to come down in an angle and then draw another curved shape for the flap. Then half way down that line, draw another line down. Draw the lining on the inside of the shoe.
Add stitching to the body of the shoe. Web eraser coloring supplies time needed: This will basically be a silhouette but without some of the smaller details.

How to Draw a Shoe Really Easy Drawing Tutorial

Shoes Drawing Reference and Sketches for Artists

How to draw SHOES for kids YouTube

how to draw shoes step by step

Shoe Drawing How To Draw A Shoe Step By Step

How to draw Shoes Cool, Some, KD and 4 Perfect Ideas

Easy Shoe Drawing at Explore collection of Easy

How to Draw Shoes

How to Draw Shoes

How To Draw A Shoe

How To Draw Shoes Step By Step Pictures

How to Draw Shoes Easy and Step by Step Learn How to Draw shoes for

HOW TO DRAW A SHOES DRAWING NIKE SHOES YouTube

