
Portrait Black/Brown And Colored Pencil Sketch How To Draw Realistic Nose

How To Draw A Simple Nose For Beginners Explore thousands of

How To Draw Sketch Nose Sketch Drawing Idea

How To Draw Realistic Noses » Tacklerun

10 Amazing Nose Drawing Tutorials & Ideas Brighter Craft Çizim

How to Draw Realistic Noses, Draw Noses, Step by Step, Nose, People
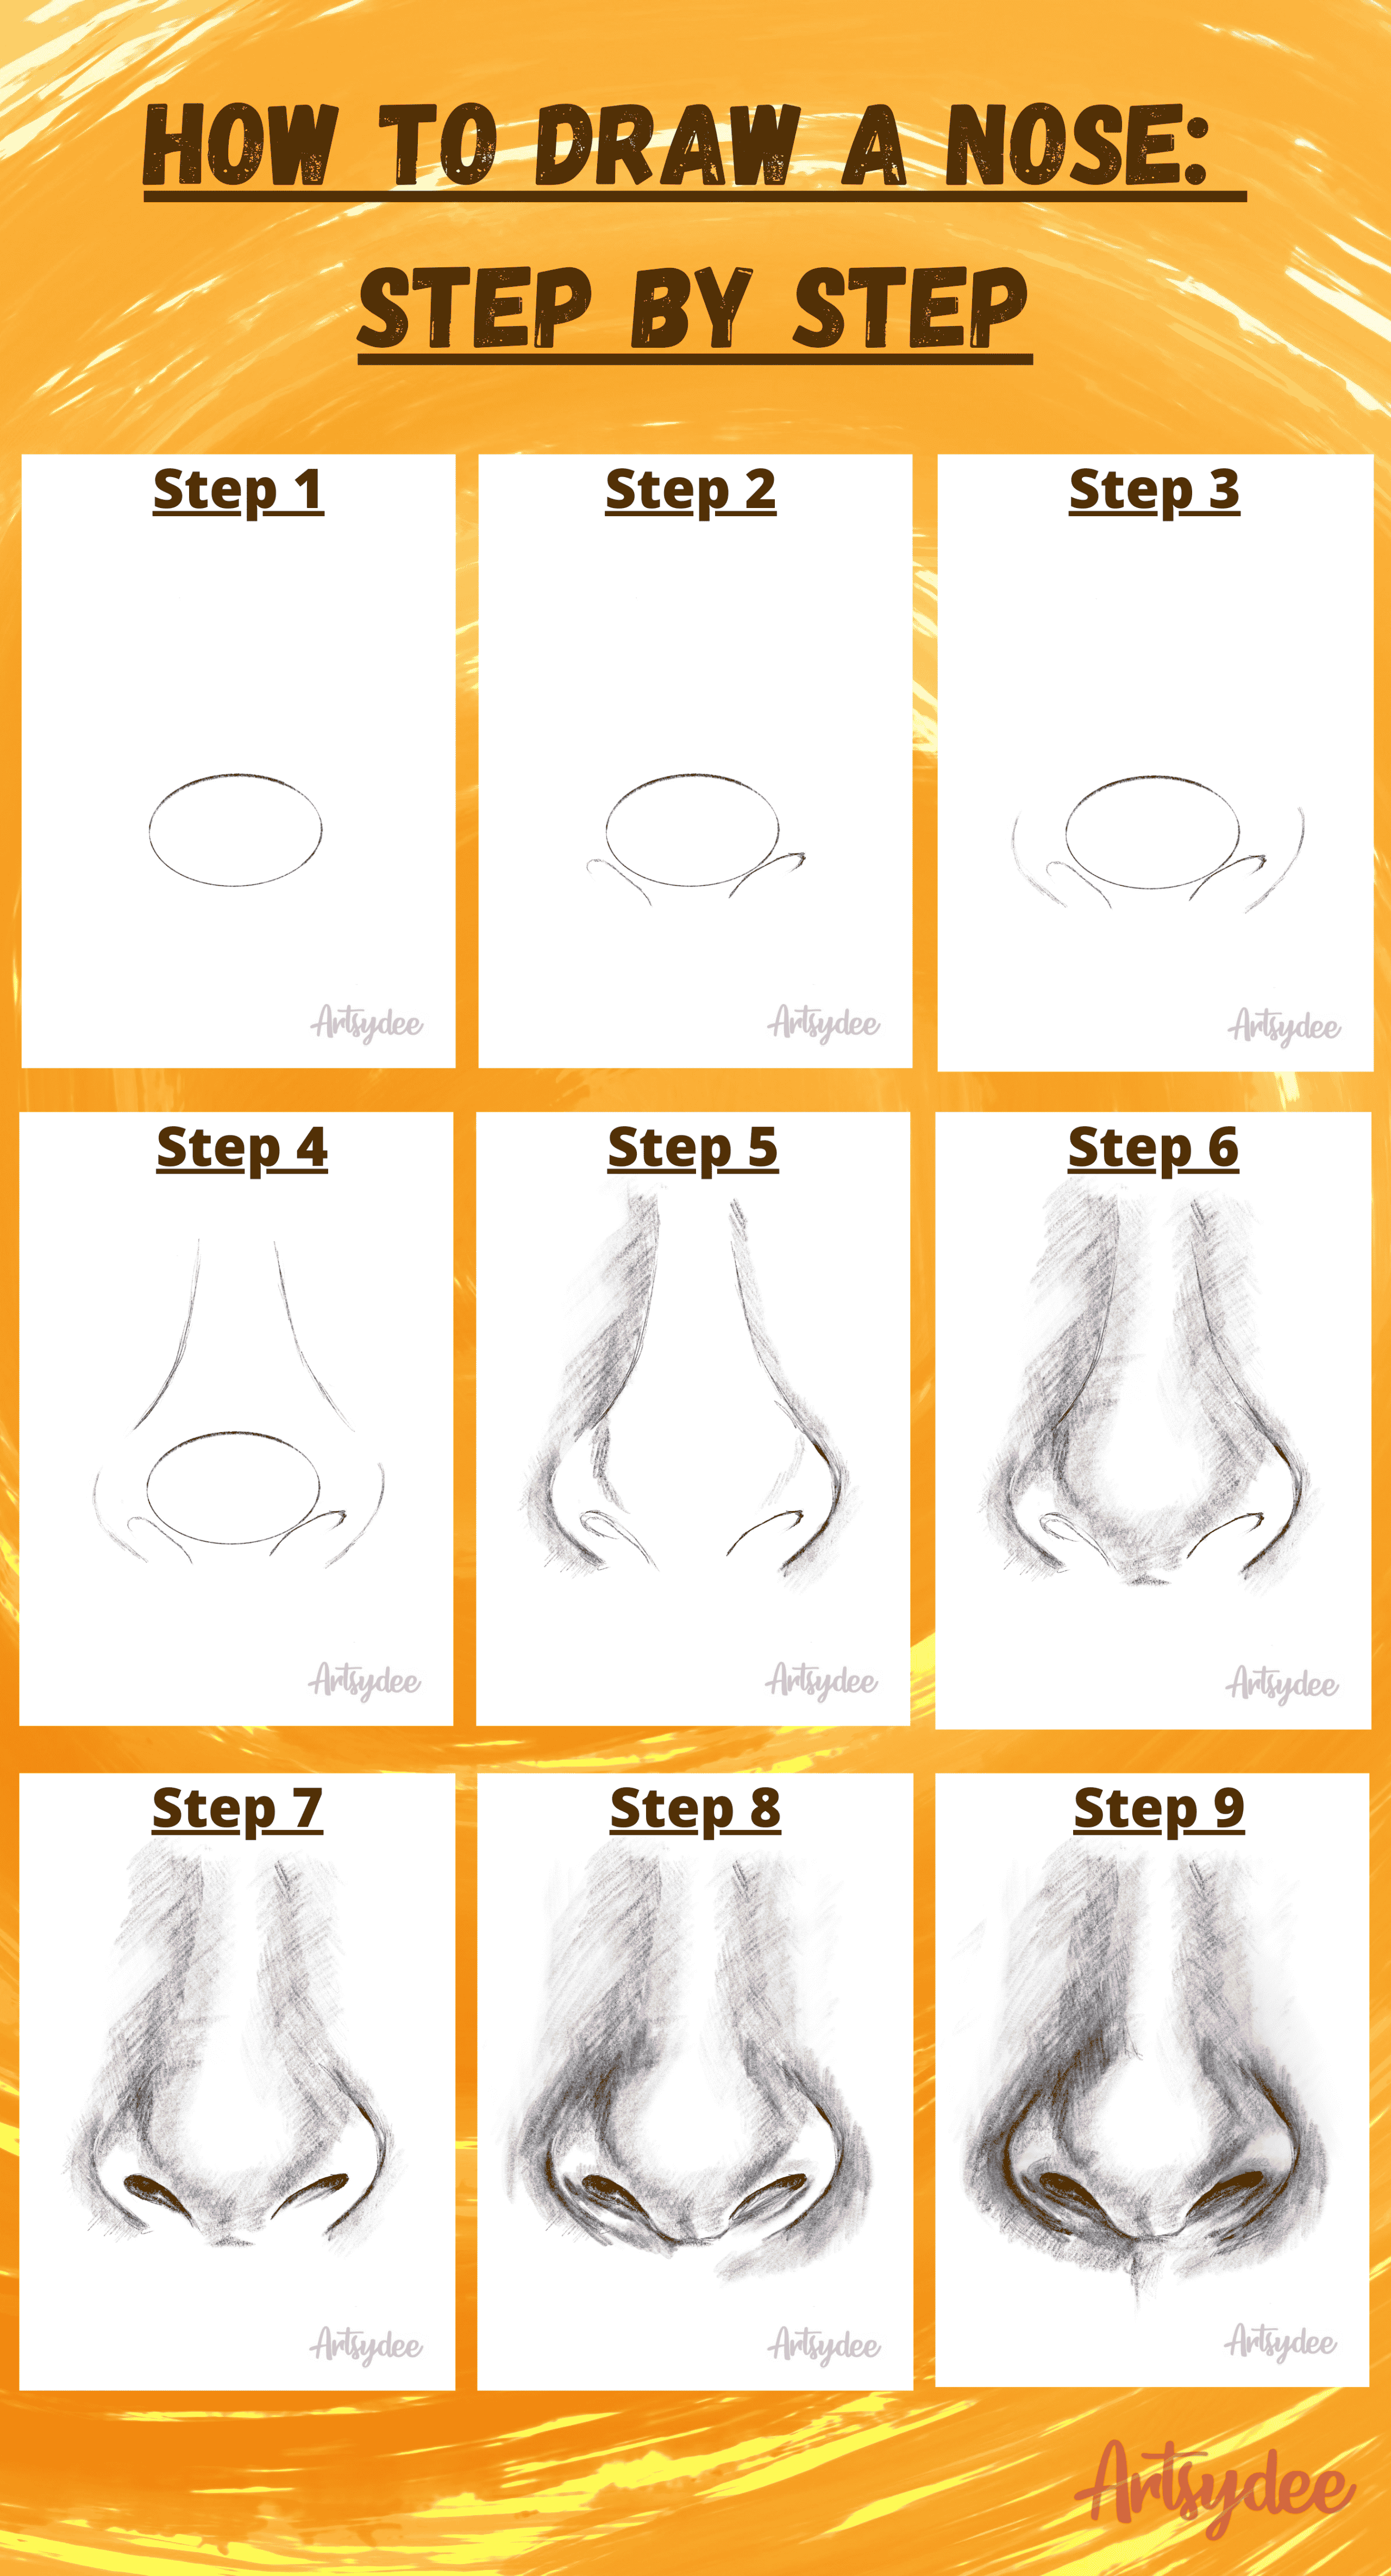
How to quickly draw the basic shadings.
How to draw realistic nose. You will learn how to draw realistic nose step by step in an easy way by also learning. Here's my new tutorial video showing how to draw a realistic nose. To keep that symmetry, i started with a vertical line.
Web understanding the basic structure of the nose will help you draw any type of nose in your style to fit the purpose of the drawing. Web in this drawing tutorial you will learn how to draw a realistic nose easily step by step with a pencil! Add lines for the bridge of.
Web this tutorial gives you a basic look at the shapes and anatomy needed for drawing realistic noses. Web drawing noses in profile 1. Now that we’ve drawn a map, we can start to make the nose look more natural.
Web get access to the full class and all my art classes on skillshare! How to draw a realistic nose. The first circle forms the profile.
Our noses are symmetrical, with the same thing on either side. Web in this drawing tutorial i'll take you through the skills and techniques needed to draw a realistic nose from a photograph (front on view). Web making sure the nose sits in the lower half of the face, with the bridge of the nose reaching just past the face’s midpoint, is a key way to make sure the nose looks like a natural part of the face.
One of the most critical aspects of the nose is the nose bridge. Exploring the basic nose shape. This triangle marks the area between the eyebrows and the nose bone.

How to draw a nose from the front 7 easy steps Nose drawing

Easy Tutorial How to Draw a Nose? Silvie Mahdal The Art of Pencil

Examples Realistic Nose Drawing HEART WITH DRAWING

70+ Easy Nose Drawing Ideas 2023 HARUNMUDAK

How to Draw a Nose Cool2bKids

How to Draw a Nose Side View StepbyStep kunstskizzen Nose

70+ Easy Nose Drawing Ideas 2022 HARUNMUDAK

How to draw a realistic nose YouTube

Simple Pencil Drawings Of Nose pencildrawing2019

How To Draw Realistic Noses » Tacklerun

How to Draw and Shade a Realistic Nose in Pencil or Graphite Easy Step

HOW TO DRAW NOSE from Different Angles Easy Nose drawing, Realistic

How To Draw A Nose Realistic Richard McNary's Coloring Pages

